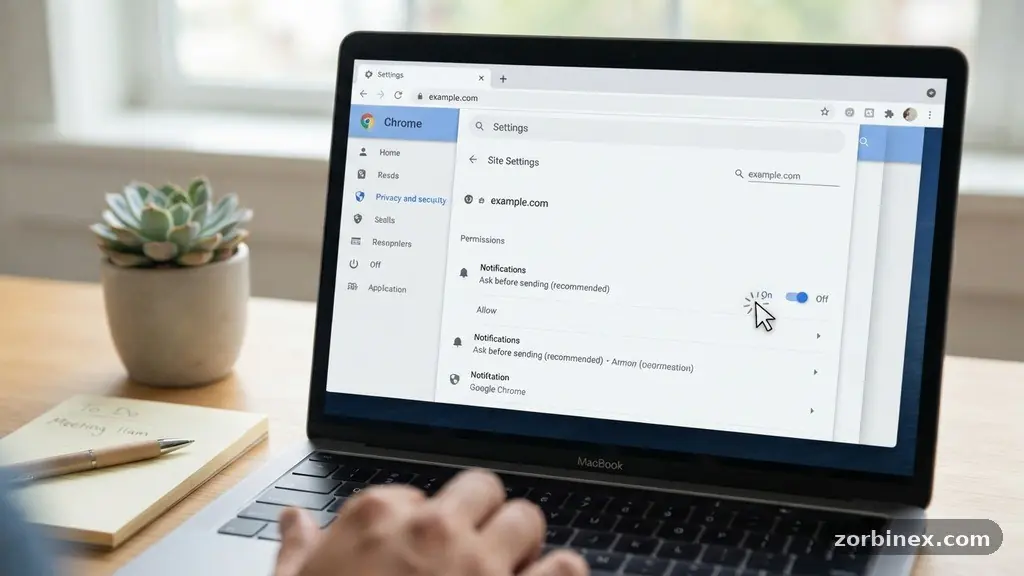
Learning the process of removing Unwanted Browser Notifications Safely is a vital skill for maintaining a clean and distraction-free digital environment. Many users inadvertently grant permission to websites that later flood their screens with intrusive alerts, promotional clutter, or even misleading links. By adjusting your browser settings, you can regain control over what content is allowed to interrupt your workflow.
This article explains how to identify the sources of these alerts and clear them out effectively without compromising your privacy or security. You will learn the exact steps to audit your permissions across major browsers like Google Chrome, Mozilla Firefox, Microsoft Edge, and Safari to ensure a smoother, more secure browsing experience.
Direct Steps for Clearing Browser Alerts
You can resolve most notification issues by diving directly into your browser’s site permissions menu. This is the fastest way to stop the constant stream of pings, as it allows you to revoke access for specific domains that have been abusing your trust. Most modern browsers group these permissions under a clear, manageable list where you can delete entries one by one or in bulk.
To start, open your browser and navigate to the settings menu, typically found under the three-dot or three-line icon in the top right corner. Search for “notifications” or “site settings” within the search bar provided in the settings tab.
You will see a list of websites currently allowed to send you push notifications. Look for any site you do not recognize or no longer wish to hear from, then select the “Remove” or “Block” option next to the URL.
For a more comprehensive look at how these permissions interact with your overall system, you can consult the official Google Chrome help documentation for managing site settings. This resource provides technical context on how browser sandboxing keeps these alerts from affecting your actual operating system.
By clearing these entries, you stop the underlying scripts from triggering alerts in the future. Once you have pruned the list, you should notice an immediate decrease in the volume of pop-ups appearing on your desktop.
Managing Notifications in Google Chrome
Google Chrome is the most widely used browser, and its notification management system is designed for quick user intervention. If you are struggling with notification spam, Chrome’s interface allows you to see exactly which sites have permission to push content to your action center. You should verify these permissions periodically to keep your browsing environment clean.
Navigate to Settings, then click on “Privacy and security” in the sidebar. Select “Site Settings” and then click on “Notifications” to view the list of sites that currently have permission to send you alerts.
You can manually remove any sites you don’t recognize or that send irrelevant content. It is also a good practice to toggle the “Sites can ask to send notifications” setting to off if you want to prevent new sites from bothering you entirely.
If you find that a site keeps asking for permission, checking the “Don’t allow sites to send notifications” option will act as a blanket block. This is particularly useful if you find yourself frequently clicking through sites that use aggressive marketing tactics. Remember that clearing your browser cache and site data occasionally can also help clear out lingering session information that might be trying to re-trigger these permission prompts.
Handling Alerts in Mozilla Firefox
Mozilla Firefox approaches site permissions with a focus on user privacy, making it relatively simple to manage what sites are allowed to track or alert you. The browser keeps these settings in a dedicated section that is easily accessible through the main menu. You can audit your list of allowed sites to ensure that only trusted platforms remain on your approved list.
Go to the menu icon and select “Settings,” then navigate to the “Privacy & Security” panel. Scroll down until you find the “Permissions” section, where you will see “Notifications” listed with a “Settings” button next to it.
Clicking this button opens a window showing every website that has been granted permission to send you updates. You can highlight any site in this list and click “Remove Website” to instantly stop its alerts.
Firefox also allows you to block new requests entirely by checking the box that says “Block new requests asking to allow notifications.” This is a helpful preventive measure for users who find the constant pop-up prompts distracting or annoying. If you ever need to restore access to a site, you can simply remove it from the “Block” list and visit the site again to re-authorize it.
Securing Microsoft Edge and Safari
Microsoft Edge shares much of its underlying architecture with Chrome, so the process for managing alerts is quite similar. Open the “Settings and more” menu, go to “Cookies and site permissions,” and select “Notifications.”
Here, you will find an “Allow” list that you can prune to remove any unwanted domains. Edge also provides a “Quiet notification requests” feature that prevents sites from showing intrusive pop-ups, which is a great way to improve your browsing comfort.
Apple users running Safari on macOS have a slightly different workflow for managing these permissions. Open Safari and click on “Safari” in the top menu bar, then select “Settings” or “Preferences.”
Go to the “Websites” tab and select “Notifications” in the sidebar on the left. You will see a list of websites that have requested permission, and you can change their status from “Allow” to “Deny” using the dropdown menu next to each site.
Safari also allows you to remove sites from the list entirely by selecting them and clicking the “Remove” button. This ensures that the browser no longer tracks that site’s permission status. By maintaining this list, you protect your system from notification spam that can sometimes be used by malicious websites to redirect users to untrusted pages.
Distinguishing Between Legitimate Alerts and Adware
Understanding the difference between a legitimate site notification and potential adware is crucial for your digital safety. Legitimate notifications are typically requests from news sites, web apps, or email services that you have explicitly opted into. Adware or malicious websites, however, often use deceptive techniques to trick you into clicking “Allow.”
These sites may mimic common system warnings or claim you have a virus to scare you into accepting their notifications. Once you grant them permission, they can push advertisements or links to phishing pages directly to your desktop. You should always be skeptical of any site that asks for notification permissions immediately upon loading, especially if you have never visited that domain before.
| Notification Source | Typical Behavior | Risk Level |
|---|---|---|
| News Outlets | Provides headline updates | Low |
| Email Providers | Alerts for new messages | Low |
| Unknown Ad Sites | Random ads or fake alerts | High |
| Download Portals | Aggressive pop-ups/Redirects | High |
If you notice that your browser is pushing ads for products you never searched for or fake system warnings, you are likely dealing with adware. Simply removing the site from your notification permissions list is the first step toward reclaiming your browser. You may also need to run a scan with a reputable security tool if the issue persists after clearing your browser settings.
Preventative Measures for a Cleaner Browser
Beyond manually removing unwanted entries, you can take proactive steps to ensure your browser remains free of intrusive alerts. One of the most effective strategies is to use browser extensions that act as pop-up blockers or notification managers. These tools can automatically decline permission requests, saving you the effort of manually managing them.
Another vital practice is to be mindful of the “Accept Cookies” or “Allow Notifications” banners that appear on almost every website today. Many users click “Accept” out of habit just to make the banner disappear.
Instead, take a second to click “Decline” or “Reject” whenever possible. This simple habit prevents the vast majority of notification spam from ever establishing a foothold in your browser.
Keeping your browser updated to the latest version is also essential for security. Browser developers frequently patch vulnerabilities that could be exploited by malicious websites to bypass permission settings. By running the latest version of Chrome, Firefox, Edge, or Safari, you ensure that you have access to the latest security features and controls for managing your site permissions.
Frequently Asked Questions
Why do websites keep asking for notification permissions?
Many websites use notifications to drive traffic back to their pages or to display advertisements. They often trigger these requests as soon as you land on their site, hoping you will click “Allow” without fully considering the consequences. It is a common engagement tactic, but it can quickly become intrusive if too many sites are granted access.
Are browser notifications dangerous to my computer?
Most notifications are simply annoying, but they can be dangerous if they contain links to malicious websites or phishing scams. If you accidentally grant permission to a site that uses these alerts to distribute malware, you could be exposed to greater risks. Always stick to granting permissions only to sites you know and trust.
Does clearing my browser cache help stop notifications?
Clearing your cache and site data is a good way to reset your browsing experience, but it does not always revoke notification permissions. Those permissions are often stored in a separate database within your browser settings. You must specifically go to the “Notifications” or “Site Permissions” section to revoke access for specific sites.
Can I disable all notification requests permanently?
Yes, most major browsers offer a setting to block notification requests by default. By enabling this, you prevent websites from even asking for your permission, which effectively stops the problem at the source. Check your browser’s privacy or site settings to find the “Do not allow sites to send notifications” or similar option.
What should I do if I keep getting alerts after removing them?
If you have removed a site from your permissions list and the alerts continue, you may have a malicious extension or adware installed on your computer. You should check your installed browser extensions and remove any that seem suspicious or that you do not recognize. If that does not work, run a scan with a trusted antivirus or anti-malware program to clear out any deeper infections.
Final Thoughts on Browser Management
Taking control of your digital space is an ongoing process that requires a bit of vigilance. By regularly auditing your permissions and being cautious with the prompts you accept, you can effectively keep your experience focused and free from unnecessary distractions. Removing Unwanted Browser Notifications Safely is not just about clearing a list; it is about establishing boundaries for your online activity.
Start by checking your browser settings today to see which sites have access to your screen. If you find any entries that do not belong, remove them immediately.
If you need to make changes to your security posture, do not hesitate to use the built-in tools provided by your browser developers. A cleaner, faster, and more secure browser is well within your reach if you stay consistent with these simple maintenance habits.